- Linux
- Dataflex
- Networking
- Postgresql
- Proxmox
- Windows
- Wordpress
How to install WordPress in XAMPP with vhost on Windows
One excellent method for setting up a WordPress environment on your computer is to install WordPress locally using XAMPP. With this configuration, themes, plugins, and customizations can be tested without impacting a live website. Here's a detailed how-to for getting started:
Step 1: Download and install XAMPP
1. Download XAMPP: Get XAMPP from https://www.apachefriends.org, the official website. Select the version that works best with your operating system (Linux, macOS, or Windows).
2. Install XAMPP: Run the downloaded file and adhere to the on-screen directions to install XAMPP. Choose the components that are required to run WordPress, such as Apache and MySQL.
3. Launch XAMPP: after installation. You can manage your Apache and MySQL services using the XAMPP management interface.
Step 2: Start Apache and MySQL Servers
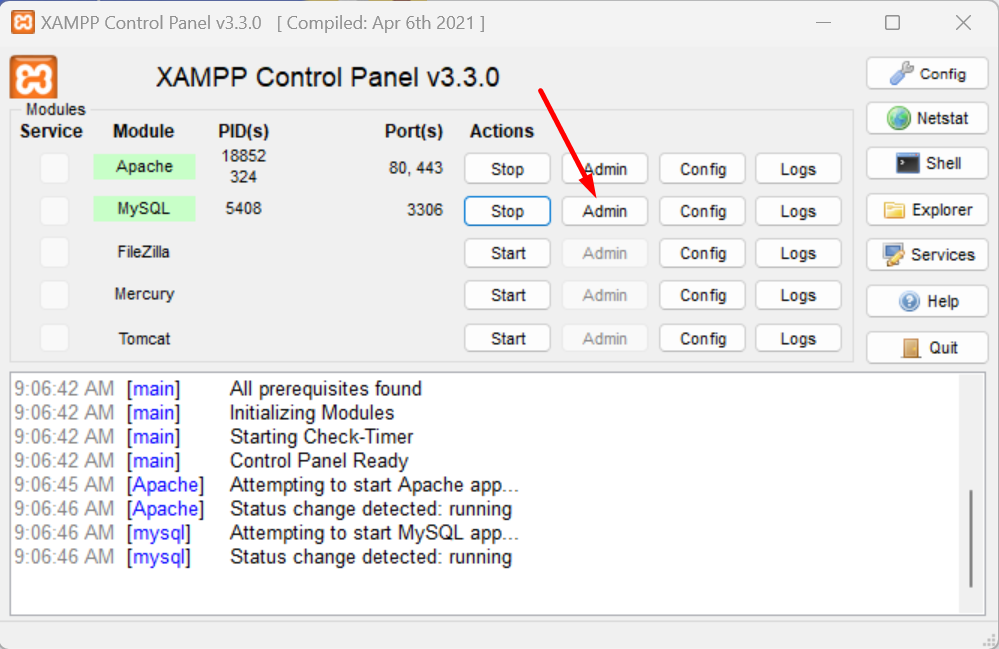
In the XAMPP Control Panel, click Start next to Apache and MySQL to start the servers. Confirm the servers are running. You should see green indicators next to each if they’re active. To check if XAMPP is working, open a browser and go to http://localhost. You should see the XAMPP dashboard.
Step 3: Create a Database for WordPress
In your browser, go to http://localhost/phpmyadmin, which will open phpMyAdmin, a database management tool. or you can simply click the admin button on XAMPP
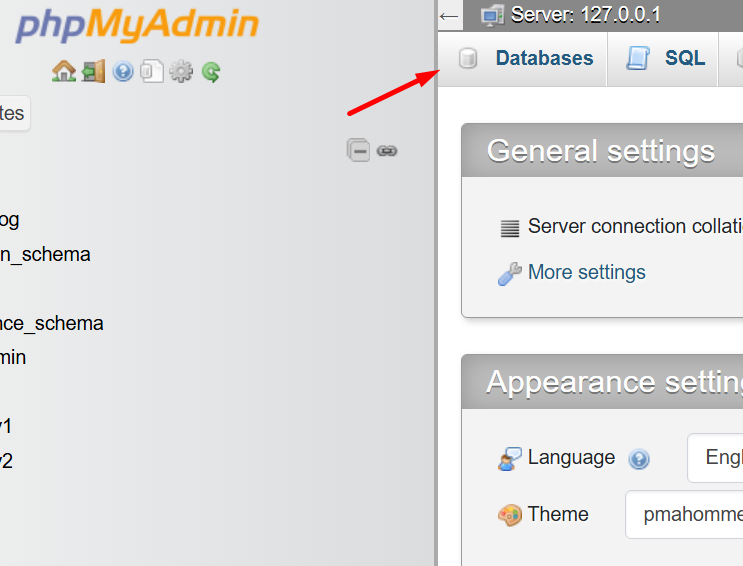
Then click databases at the top:
After giving your database a name, click Create. Whatever you choose for your name, simply keep it in mind since you'll need it for the following step:
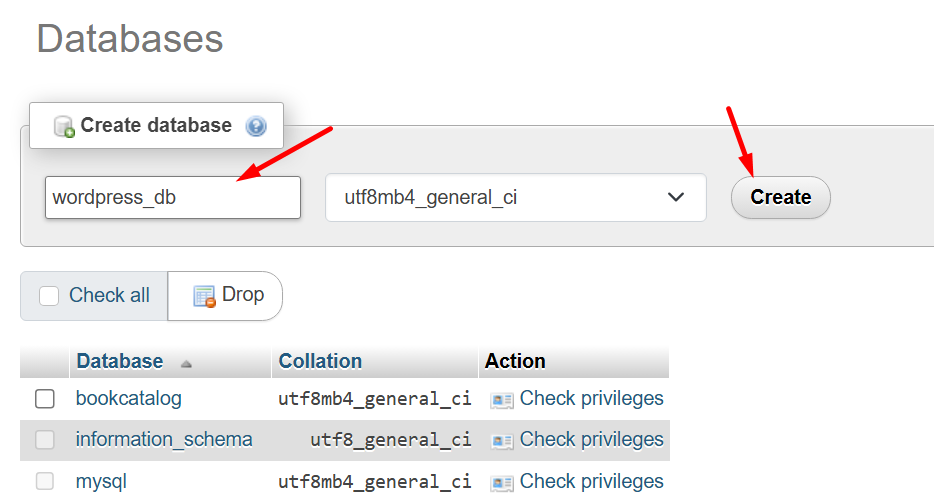
Remember this database name, as you’ll need it during WordPress setup.
Step 4: Download and install WordPress
1. Download WordPress: Go to the official WordPress website at https://wordpress.org/download/ and download the latest version.
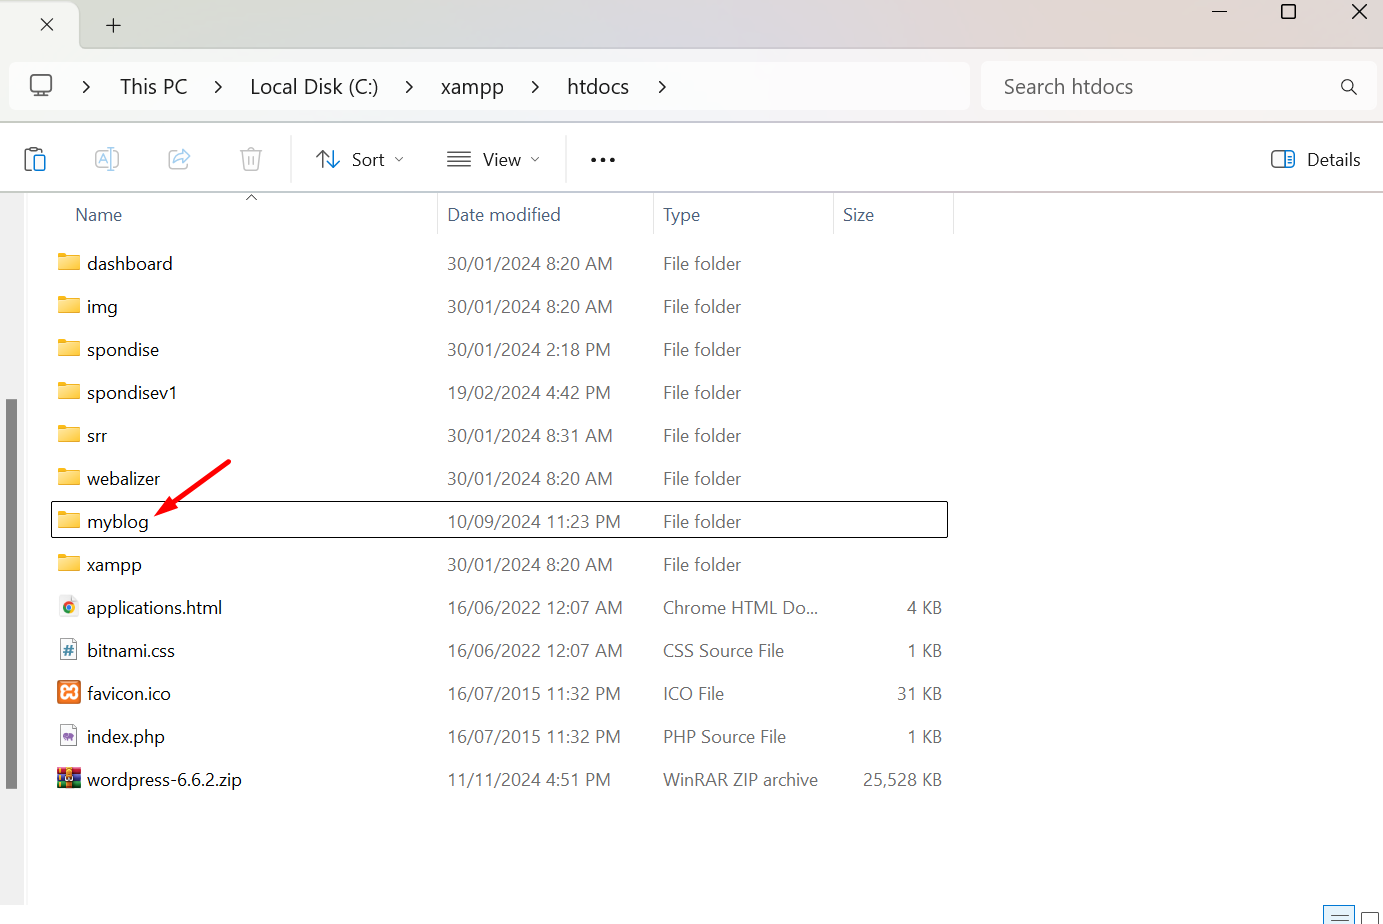
2. Extract Files: Extract the WordPress ZIP file and copy the extracted wordpress folder and paste it into the htdocs folder of your XAMPP installation directory. For Example, if you installed XAMPP on C:\xampp, paste it in C:\xampp\htdocs
3. Renaming Folder: Rename the wordpress folder to your liking but for this example we will rename it to myblog.
Step 5: Setting up vhost
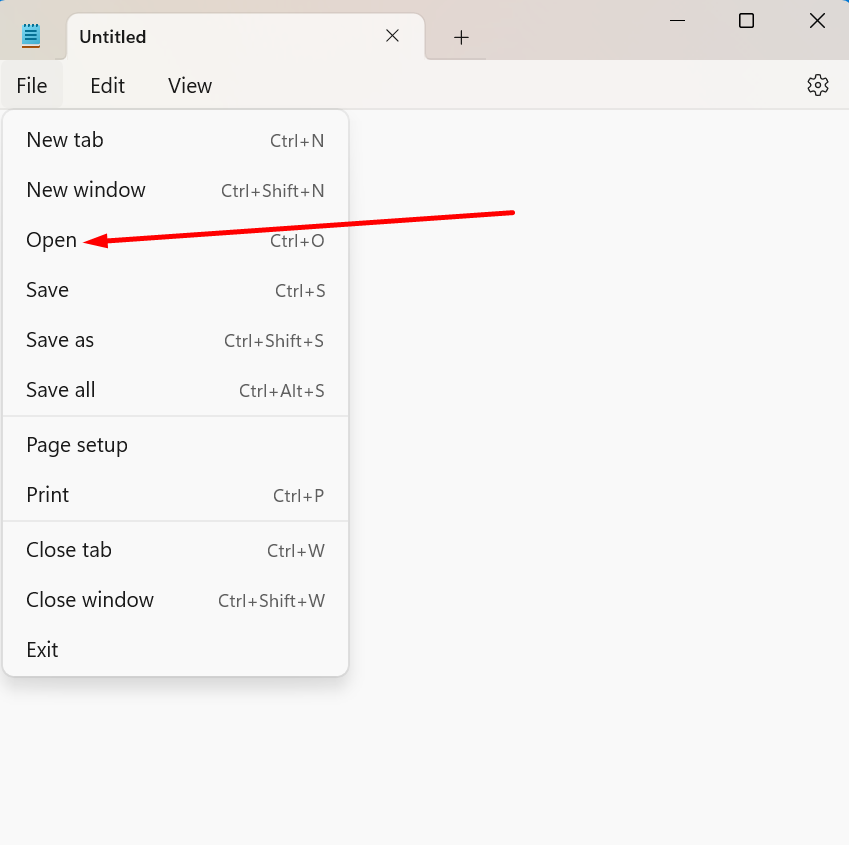
1. Edit your local hosting Open a notepad, run it as administrator
click on file at the top left corner, and click on the open on the dropdown selection
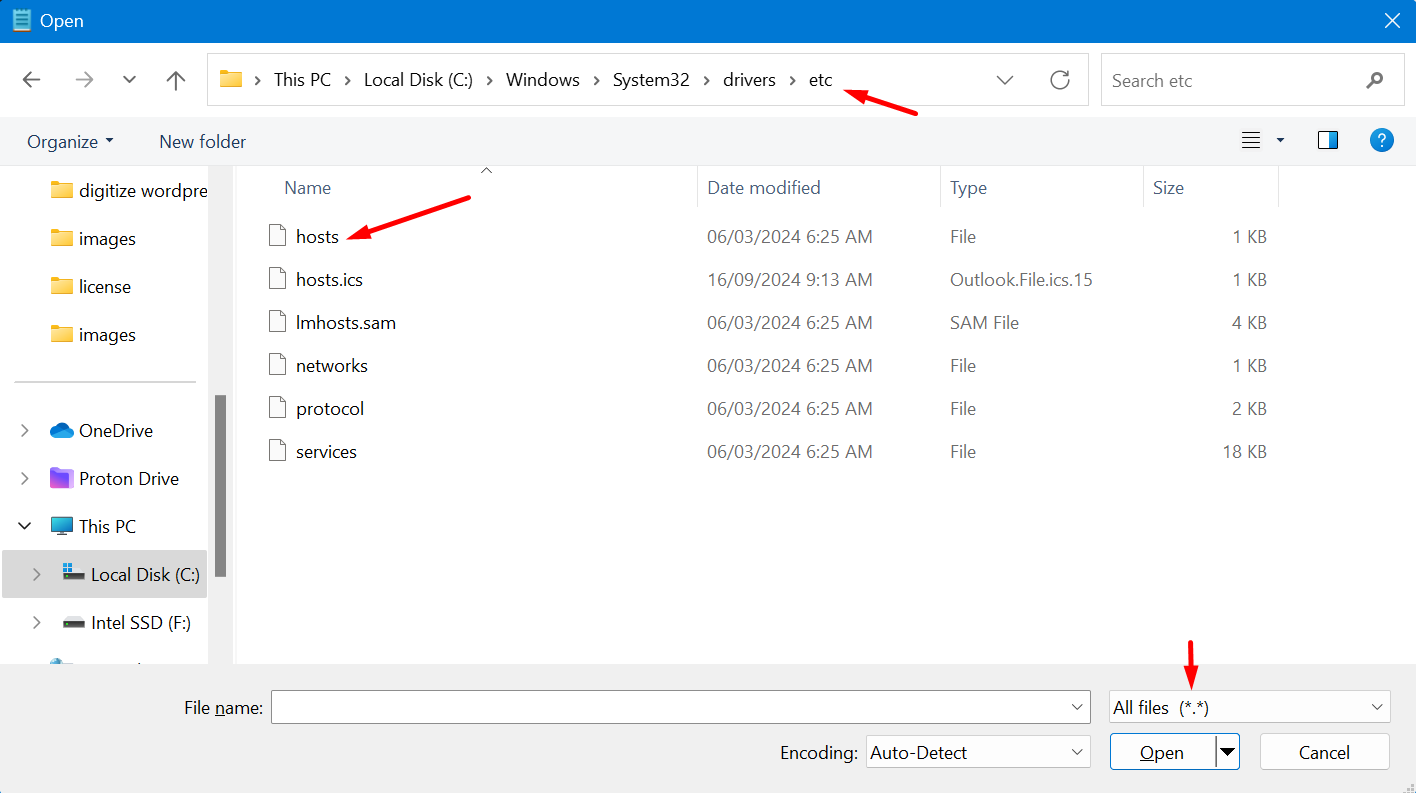
Navigate to C:\Windows\System32\drivers\etc and select the hosts file and open, if the file does not show click on the dropdown of file extensions and select all files
Add a new line of text at the bottom of the hosts file 127.0.0.1 is the default localhost and we'll use the same and host it on a different test domain and save it
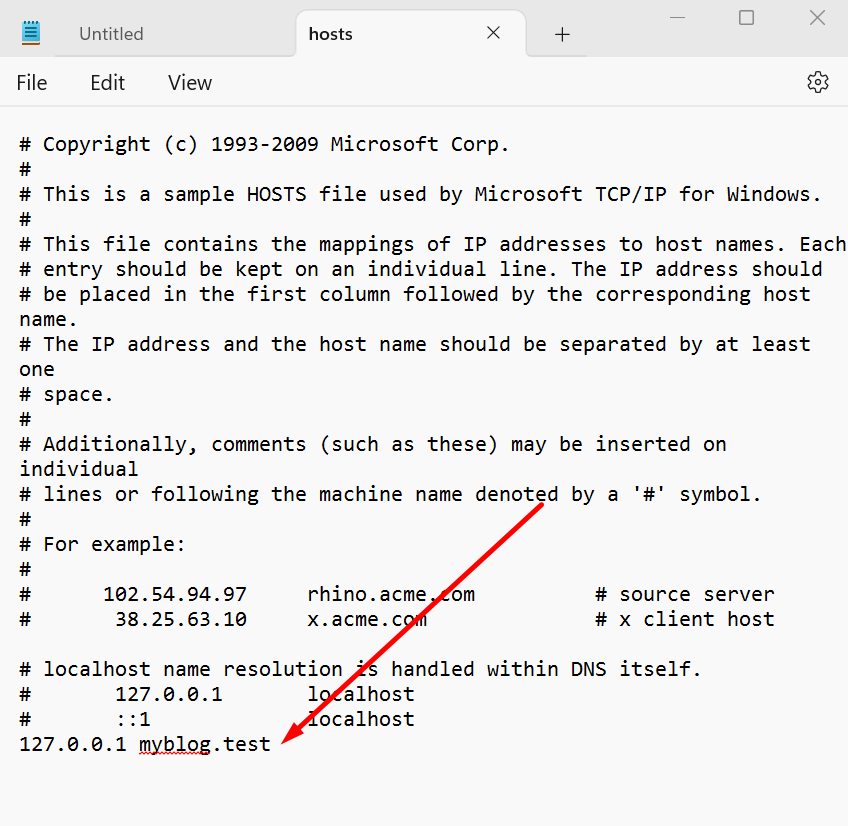
for this example, we used myblog.test
2. Enable XAMPP vhost To enable the vhost for XAMPP, go to your XAMPP app and click on Apache config button click on the dropdown Apache(httpd.conf) and it will open a notepad
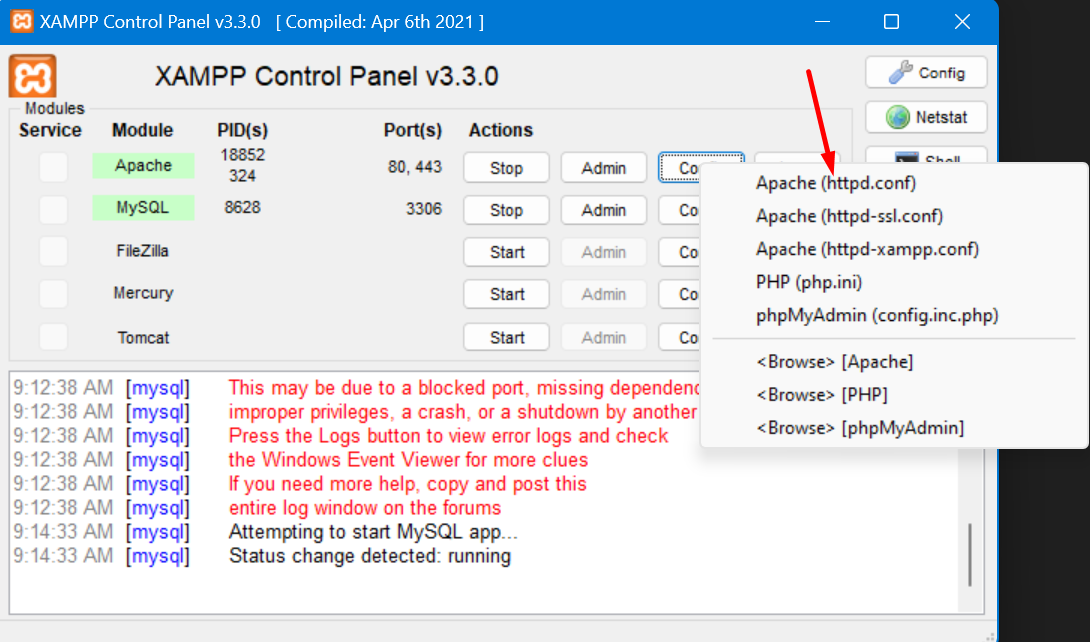
search for the line conf/extra/httpd-vhosts.conf and check if the line has been commented out. If it is then uncomment the line to enable it and save.
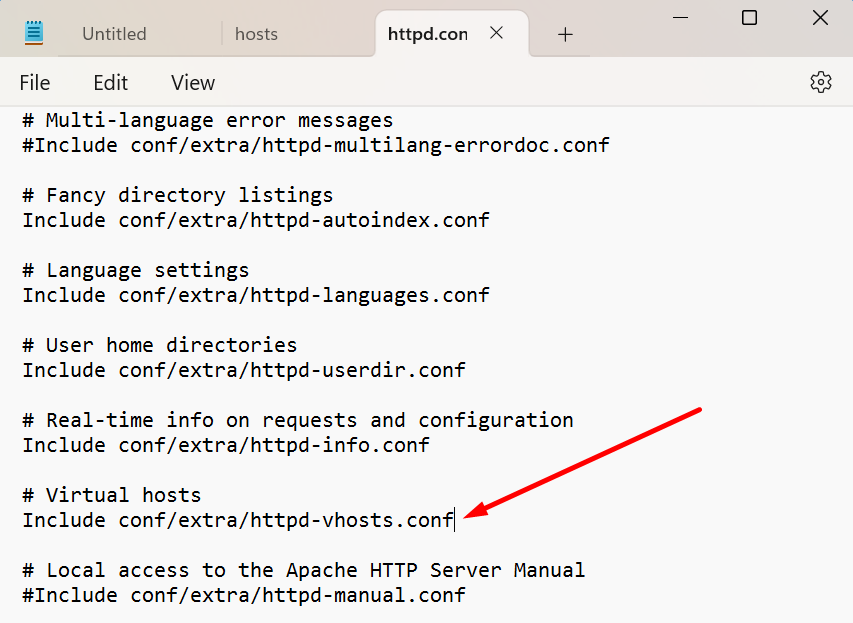
3. Edit XAMPP vhost file
Open a new notepad, click on the file at the top left corner, and click on the open on the dropdown selection
Navigate to C:\xampp\apache\conf\extra and select the httpd-vhosts.conf file and open, if the file does not show click on the dropdown of file extensions and select all files
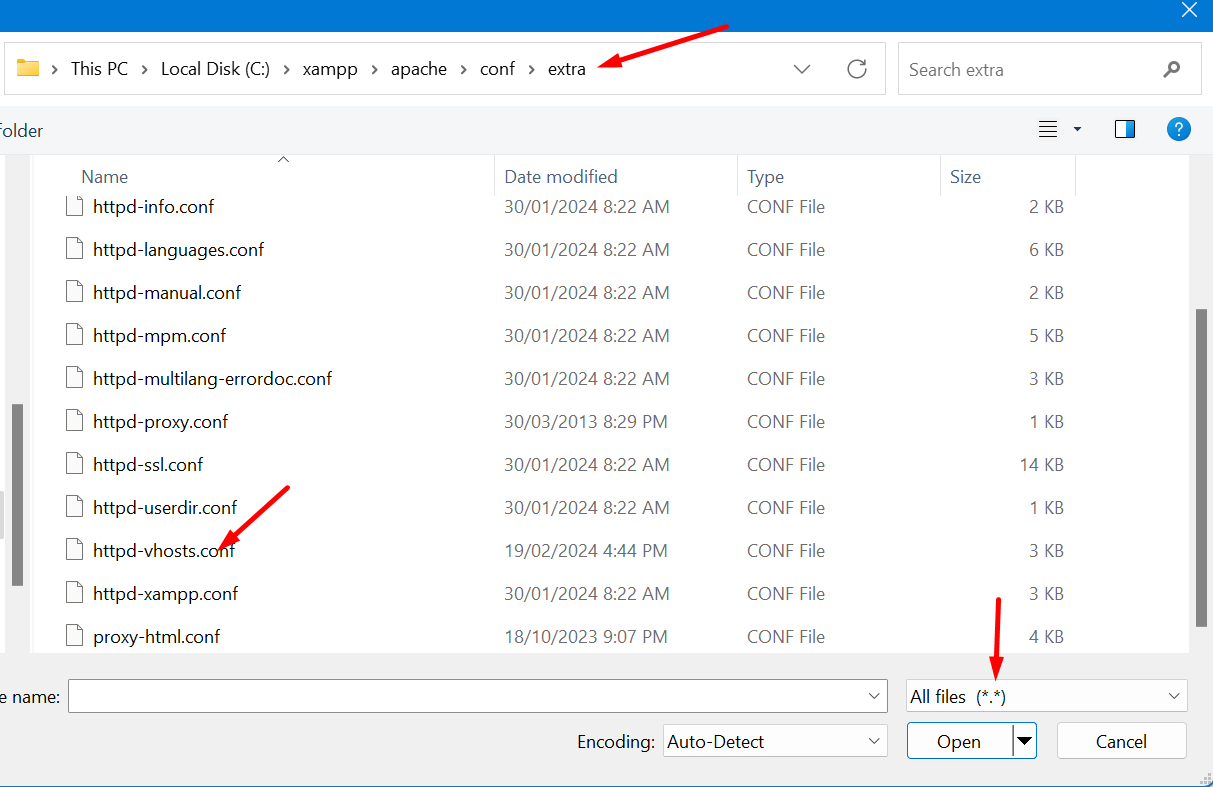
At the bottom of the file add the following code
<VirtualHost *:80>
    DocumentRoot "C:/xampp/htdocs/myblog"
    ServerName myblog.test
</VirtualHost>
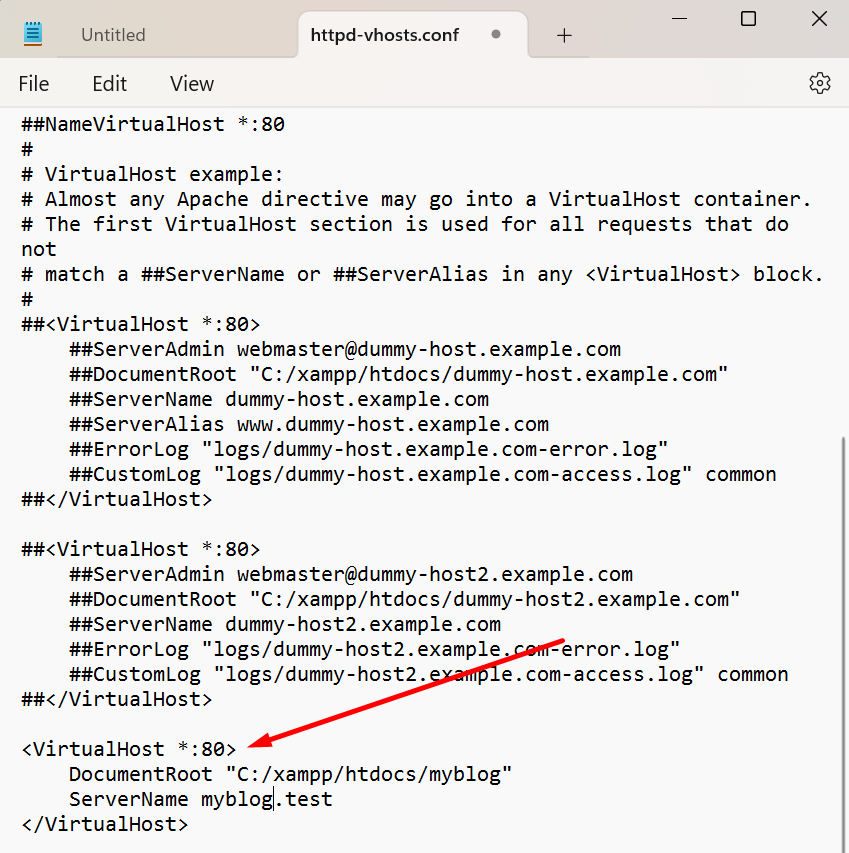
The DocumentRoot is the root of your WordPress extracted folder and renamed to myblog.
The ServerName is the domain added from the hosts file we edited on Step 5-1.
Once all of these are done, you can now restart your xampp apache and test your domain
Step 6: Install WordPress locally using the on-screen installer
Open your browser and type in the URL myblog.test

and it will open the WordPress on-screen installer
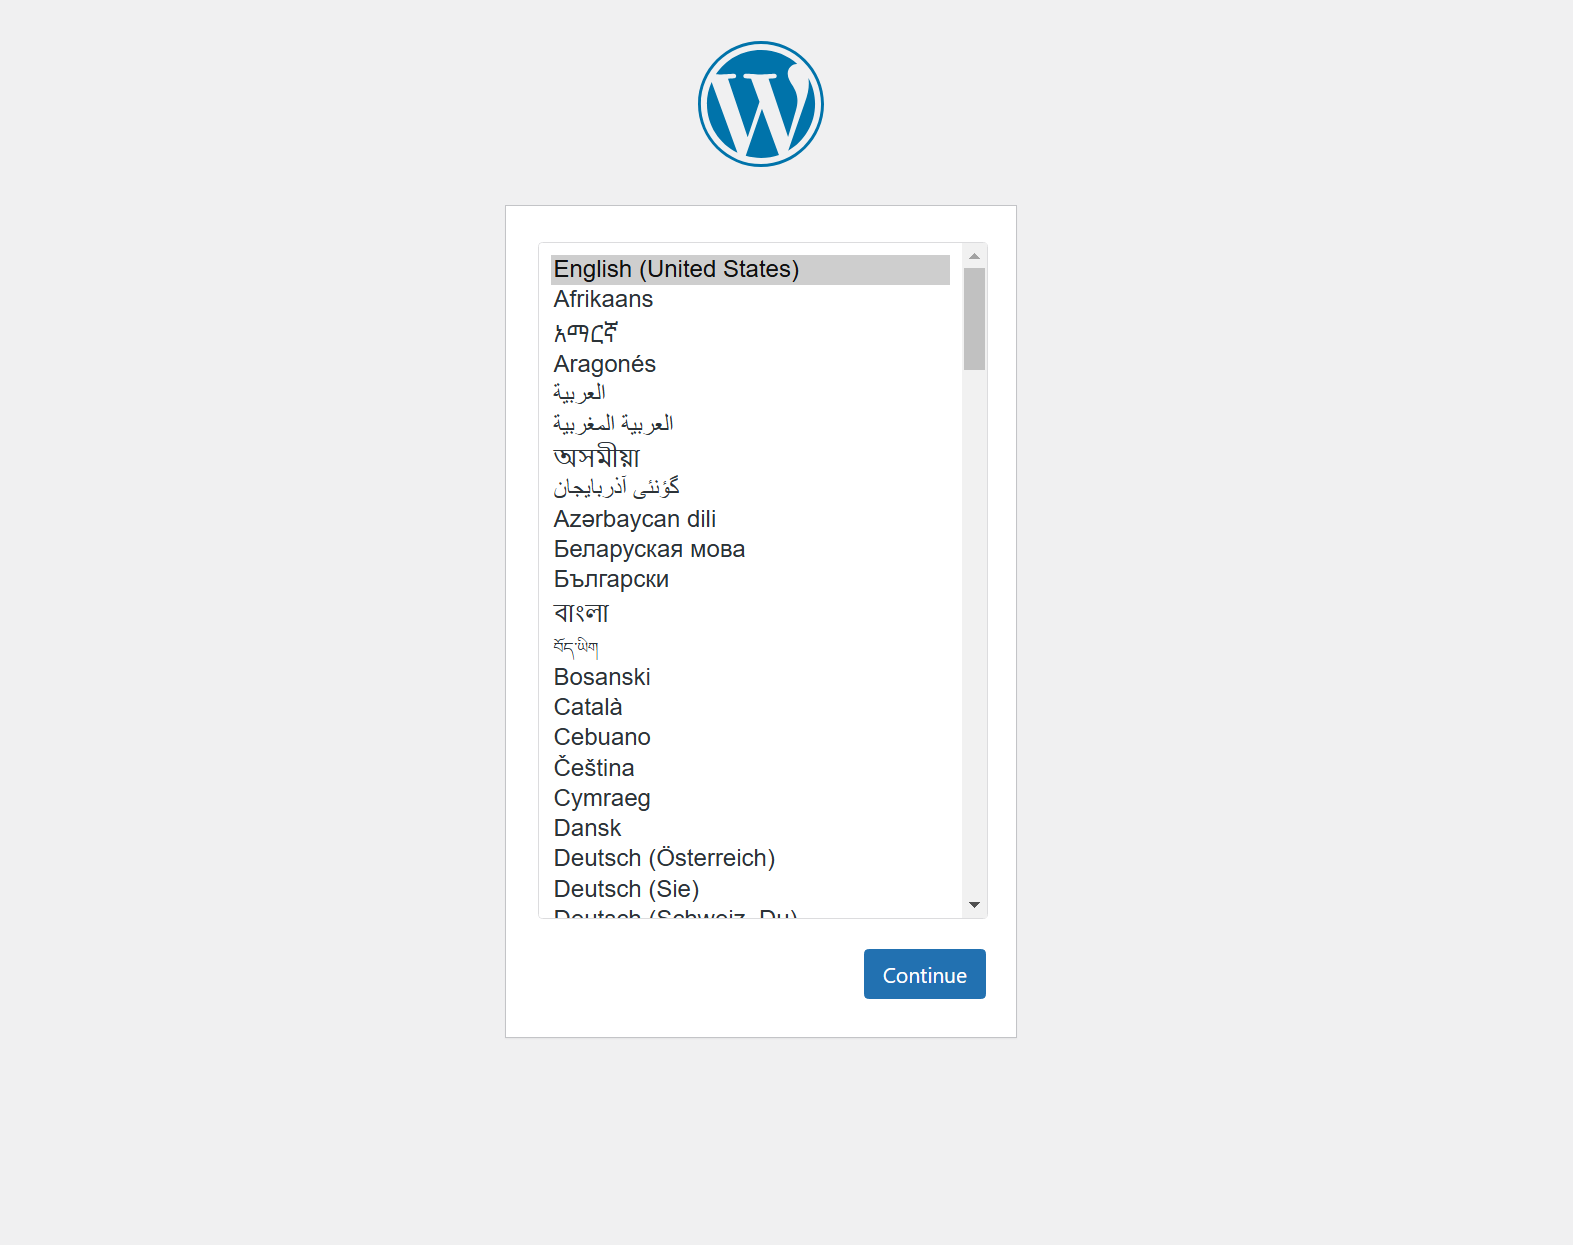
click on Continue and a new screen will show informing you that the next page will be a setup of your database.
Then click Let's go! button
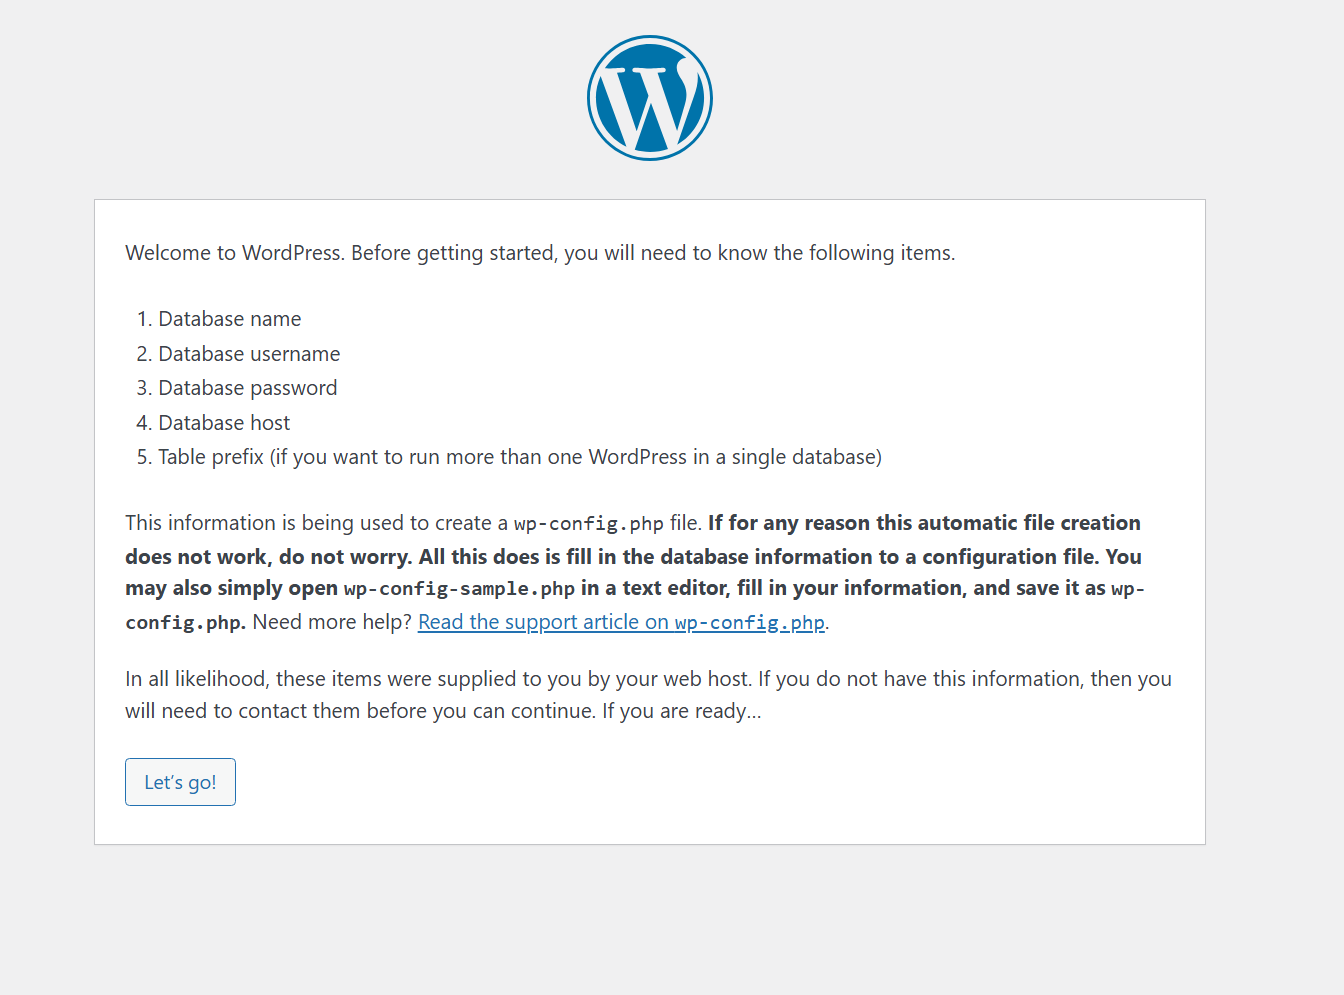
This screen will be the database setup. Enter the name of your database created on Step 3.
The default username for XAMPP is root and you can create your own database user as well.
We have not set up the password for XAMPP so we'll leave it a blank
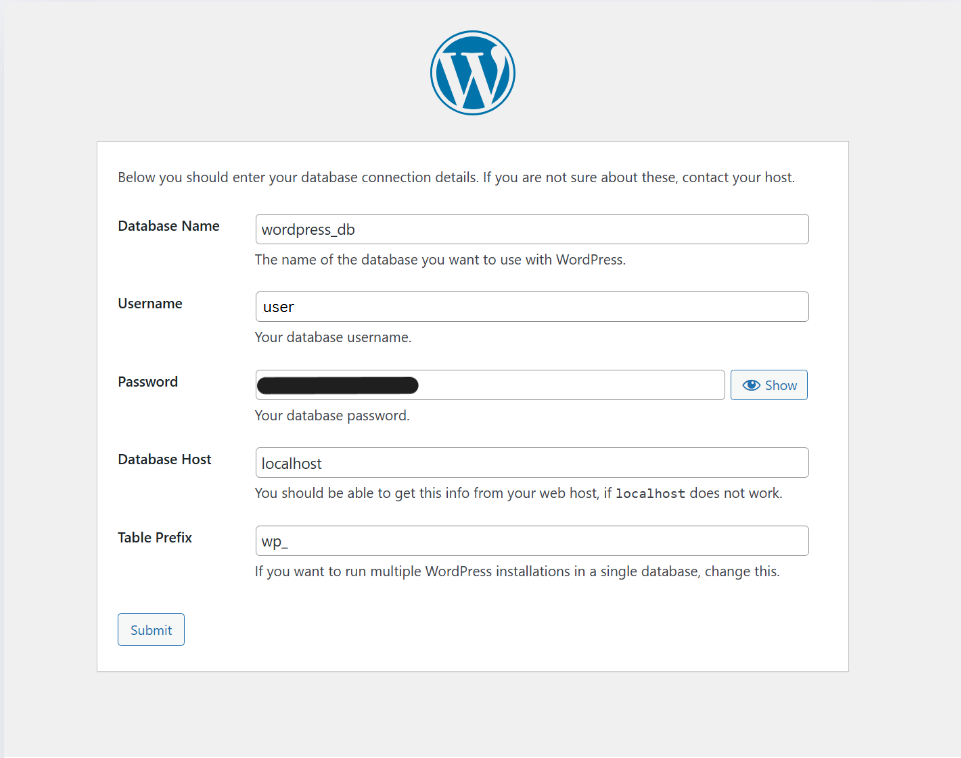
Since we are using the same local IP from hosts 127.0.0.1 we can leave it as localhost and you can change your TablePrefix on your preferences but I will leave it as is and click Submit.
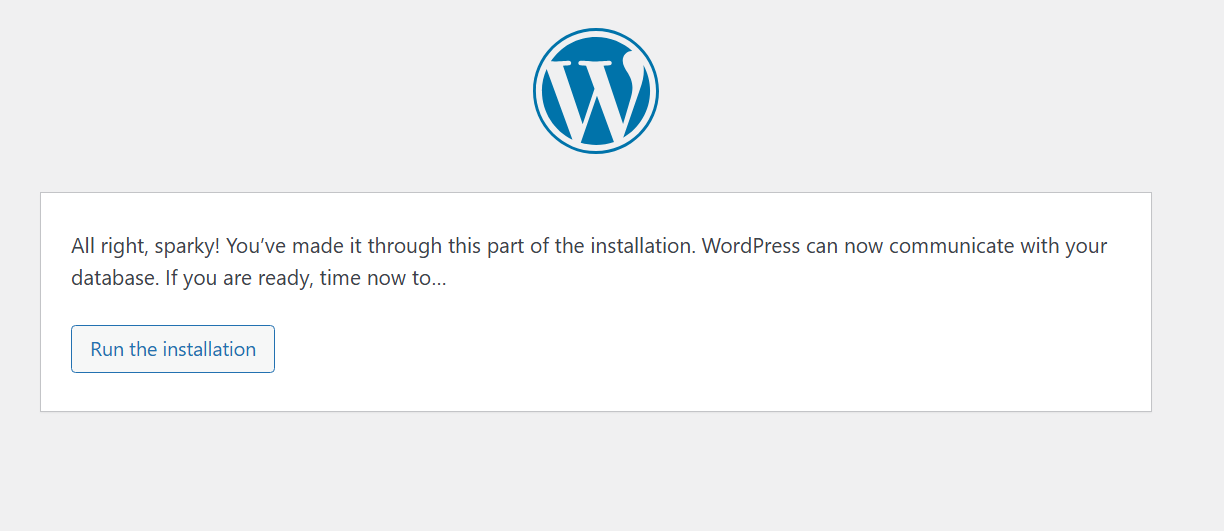
After that, you need to click on the Run the installation button
Setup your wordpress site information and click on Install WordPress button
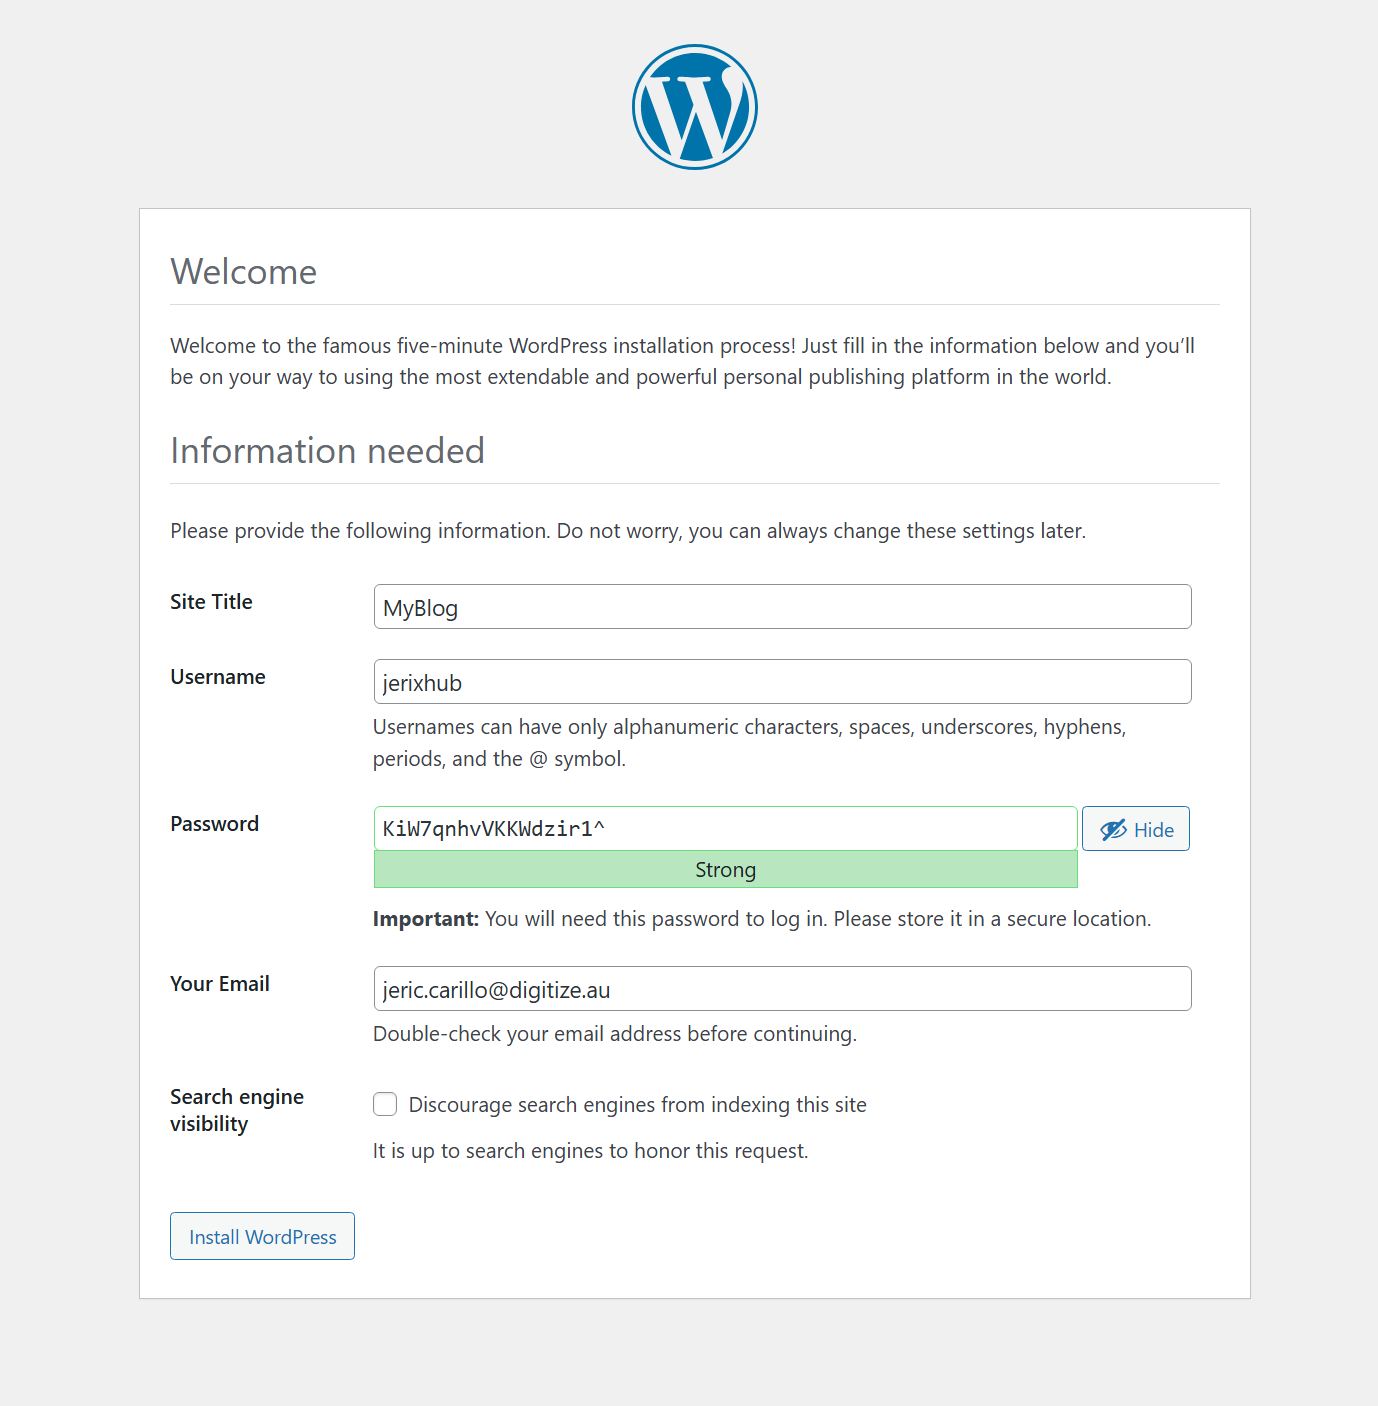
Once the installation is successful, you can now login to your dashboard and enjoy customizing your fresh and new site.
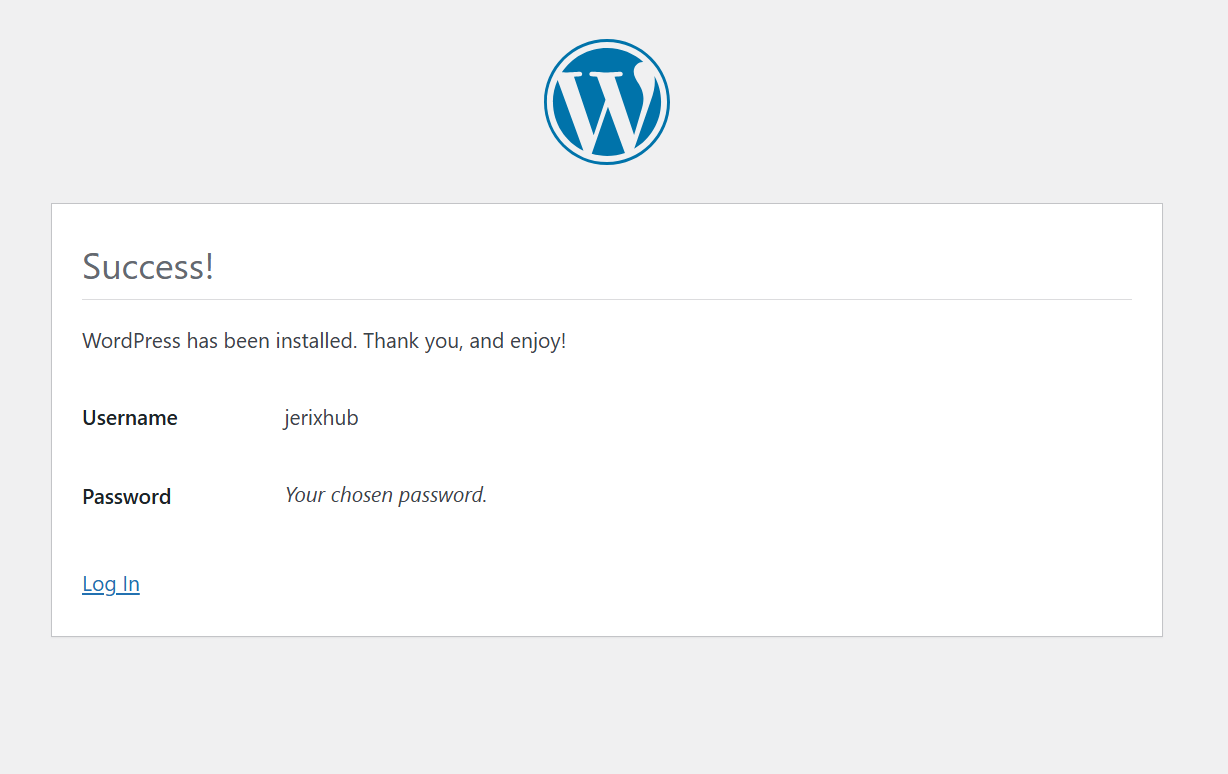
go to your homepage and check out your locally installed website

Troubleshooting Tips
Port Conflicts: If Apache fails to start, it might be due to a port conflict. Change Apache’s port by going to the XAMPP Control Panel > Config > Apache (httpd.conf) and change Listen 80 to another port like 8080
Forgotten Database Details: If WordPress can’t connect to the database, double-check the database name, username, and password in wp-config.php located in the WordPress folder
Wrapping Up
Congratulations! You’ve successfully installed WordPress locally using XAMPP. You can now experiment with WordPress themes, plugins, and customizations safely on your local machine.
Once you are able to learn on how to install WordPress locally using XAMPP vhost, it is a very easy cycle and you can setup new testing sites whenever you wanted.
As a developer, I use XAMPP and WordPress on almost a hundred sites to review and test a number of themes and plugins.